
I’ve shared the Marczynski family’s story here before: Casimir Marczynski’s wife, Mary Fabich, died of typhoid fever in 1907, leaving him a widower with six children. His mother arranged for Mary Witkowski–a young woman from Julianowo, Poland–to travel to Dunkirk that summer, and the couple were wed on August 26, 1907 in St. Hedwig’s Church. Together, Casimir and Mary raised fourteen children, opened a successful penny-candy store in town and left their mark for generations. I wanted to find a new way to tell their story, though; my idea? Google Tour Builder.
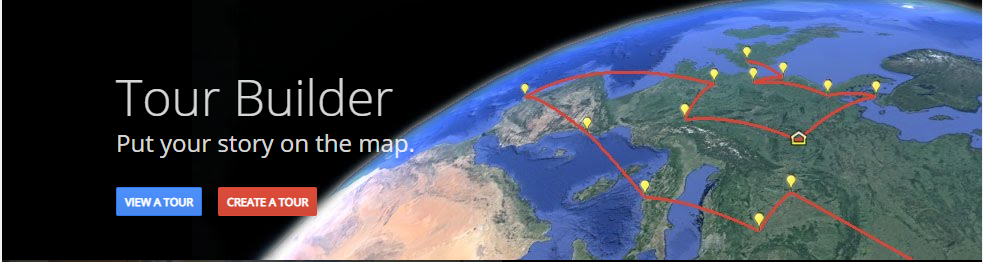
When I’m not researching my family tree, I’m teaching the technology class at an elementary school in my hometown. And in the weeks before my students’ class field trip, we made virtual field trips on Google Tour Builder, complete with photos of their destination and research about each landmark. Tour Builder allows you to show viewers the places you’ve visited and the experiences you had along the way–all in Google Earth. You pick the locations on the map–add photos, text and videos–and can share it with your family. And even though the platform was created to give veterans a way to record the places their service has taken them, it’s perfect, in my mind, for genealogy.
Here’s how to use Google Tour Builder to tell an ancestor’s story (or skip ahead to the Marczynski family’s tour):
1. Create a Tour
To create a tour, you’ll need to visit Google Tour Builder and sign in with your Google account; because the platform relies on the same interface as Google Drive, you won’t be able to create and share a tour without signing in first.
Once you click “Create a Tour” and sign in with Google on the front page, you’ll need to name your tour and provide your name; I chose to call my tour the “Marczynski Family Road Trip,” and I used my site’s name–Applegate Genealogy–as the author. Click “Create Tour” again, and you’ll be taken to the tour builder:
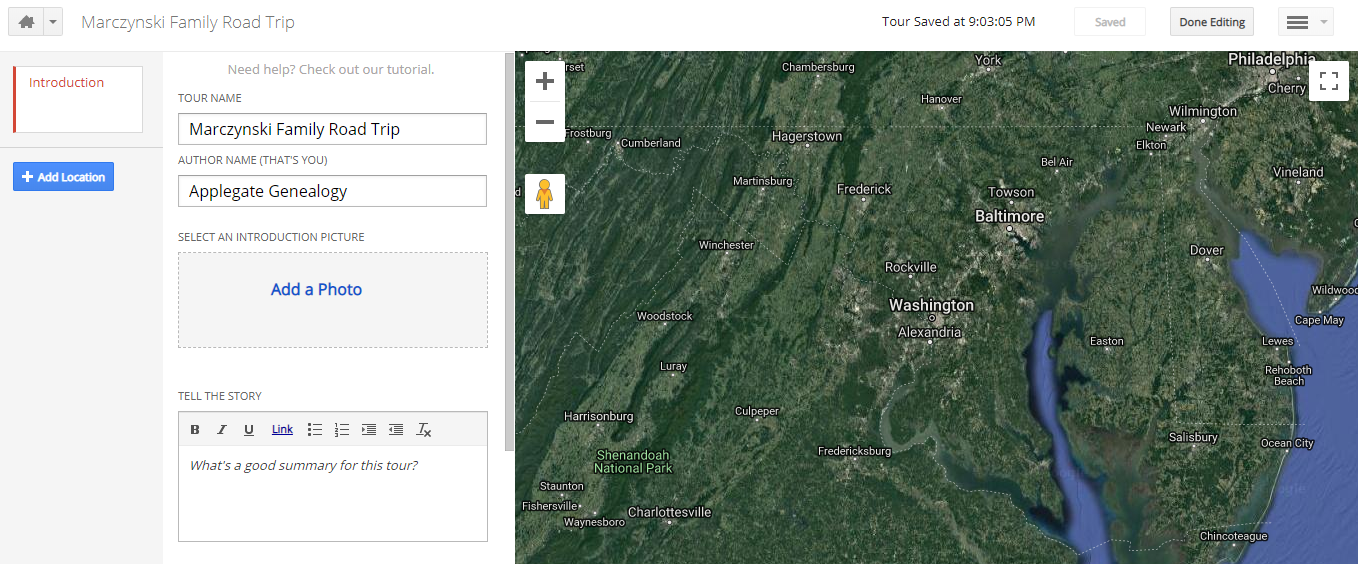
2. Add an Introduction
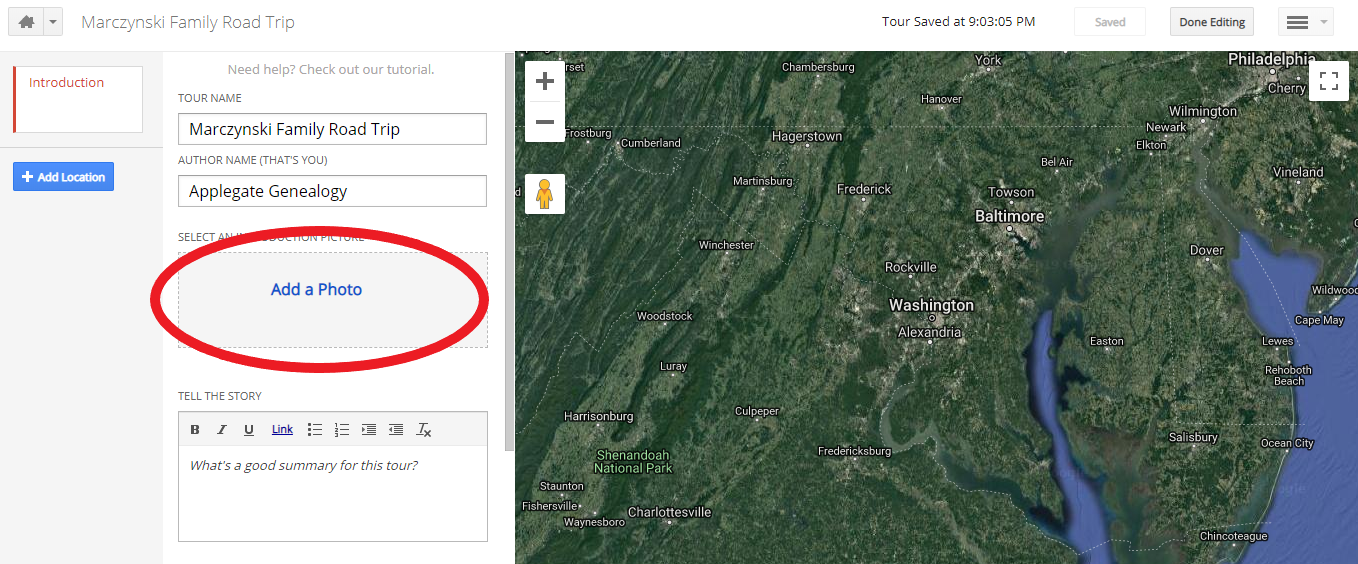
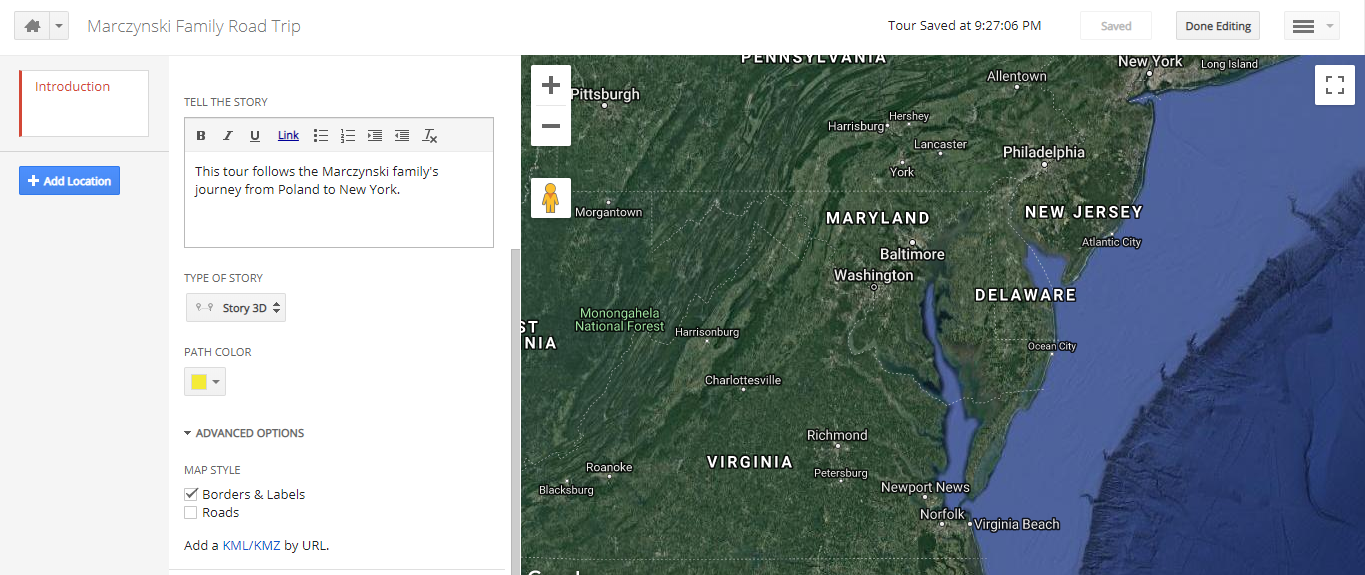
For my “Introduction,” I added a photo of the patriarch and matriarch of the Marczynski family tree–Casimir and Mary (Witkowski) Marczynski–by clicking “Add a Photo” in the center of the page and uploading a photo from my computer’s media library. You also have the option to add a caption and description for each photo once it’s uploaded.
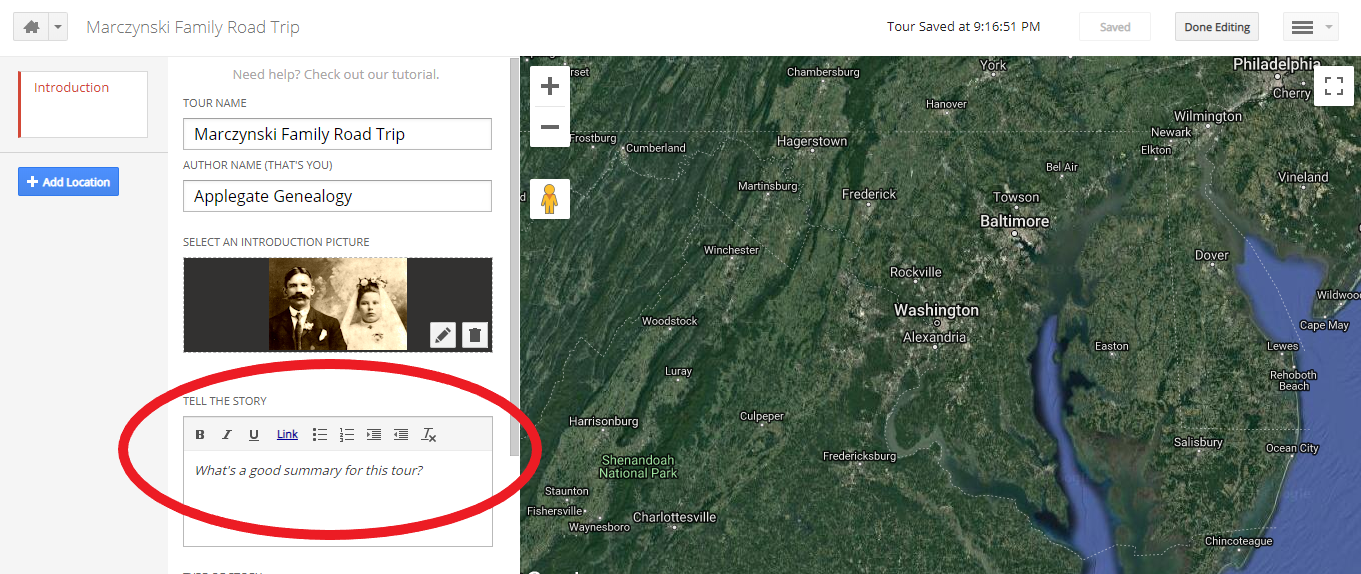
Next, I wrote a brief summary of my tour in the “Tell the Story” box below:
Below the “Tell the Story” box are advanced options that allow you to change the path color and map style. I want to highlight the third option, though: “Type of Story.” I’ve chosen “Story 3D,” which allows me to follow my ancestors’ journey from Poland through Germany, France and England and on to Ellis Island.
Your ancestor’s story may not follow a linear progression. “Hub” can be used instead to create a central placemark with lines spiraling out and to surrounding placemarks, and “Disabled” removes the lines between placemarks entirely for stories that are not tied to a particular timeline. It all depends on the story you’re telling.
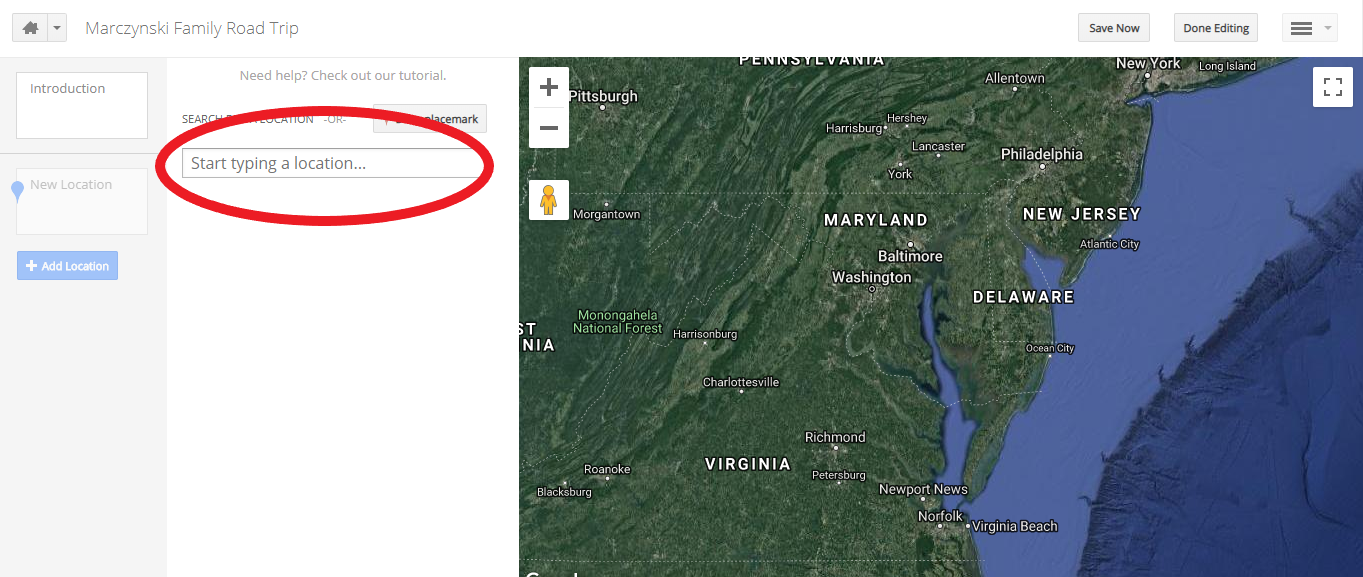
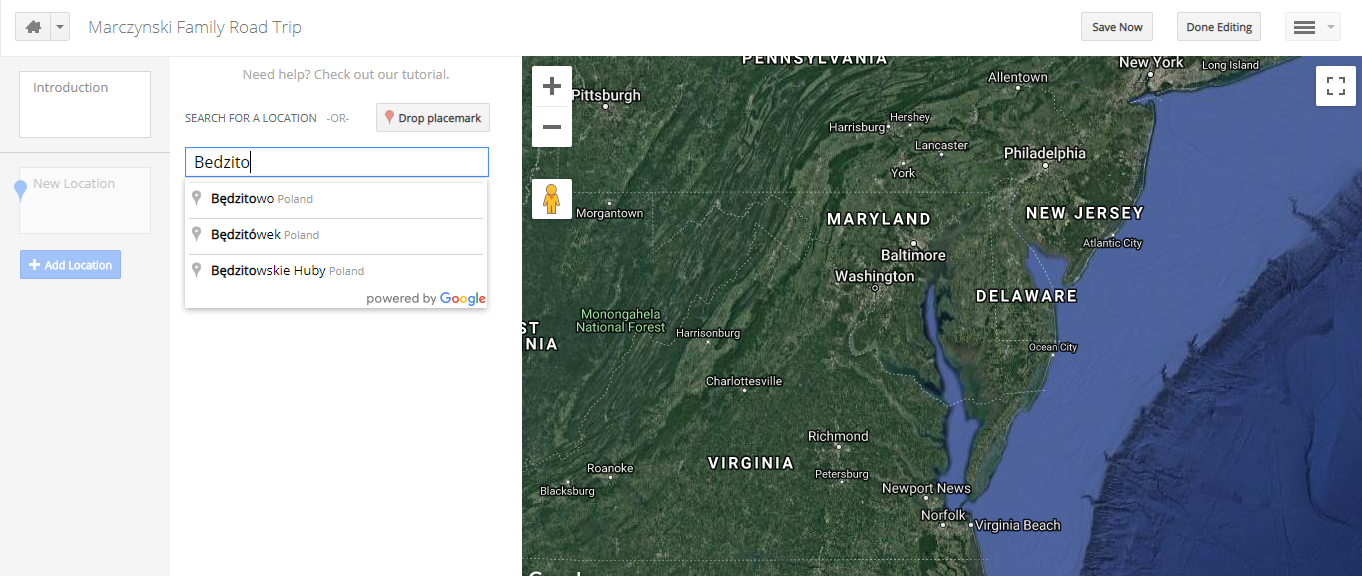
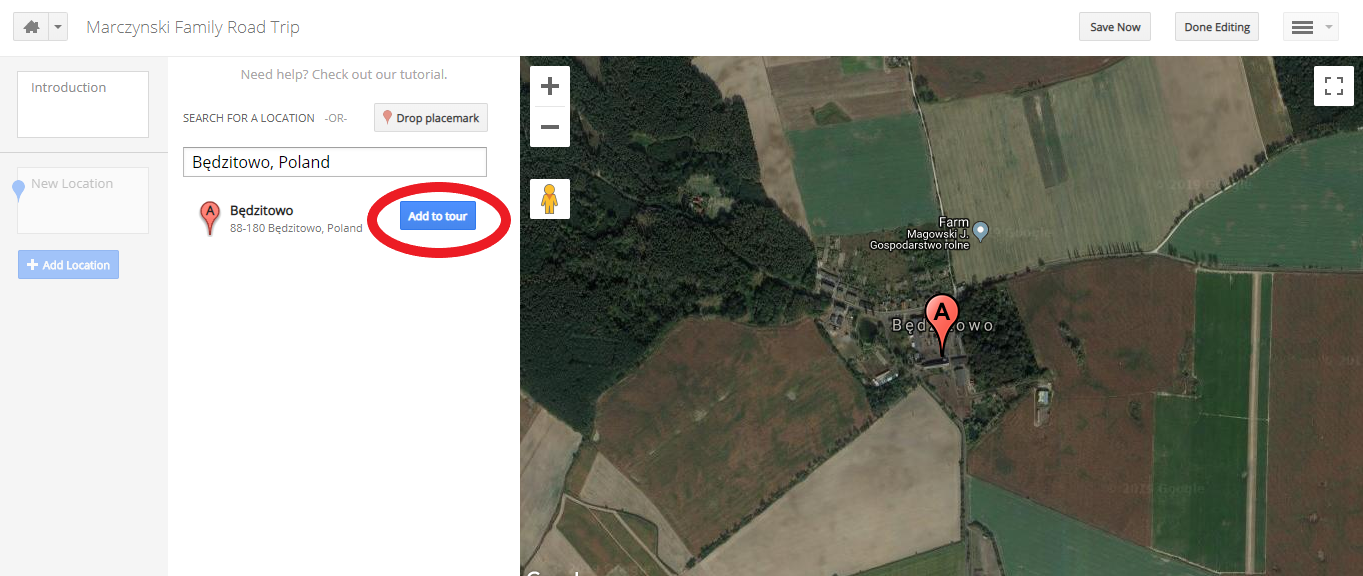
3. Add Locations
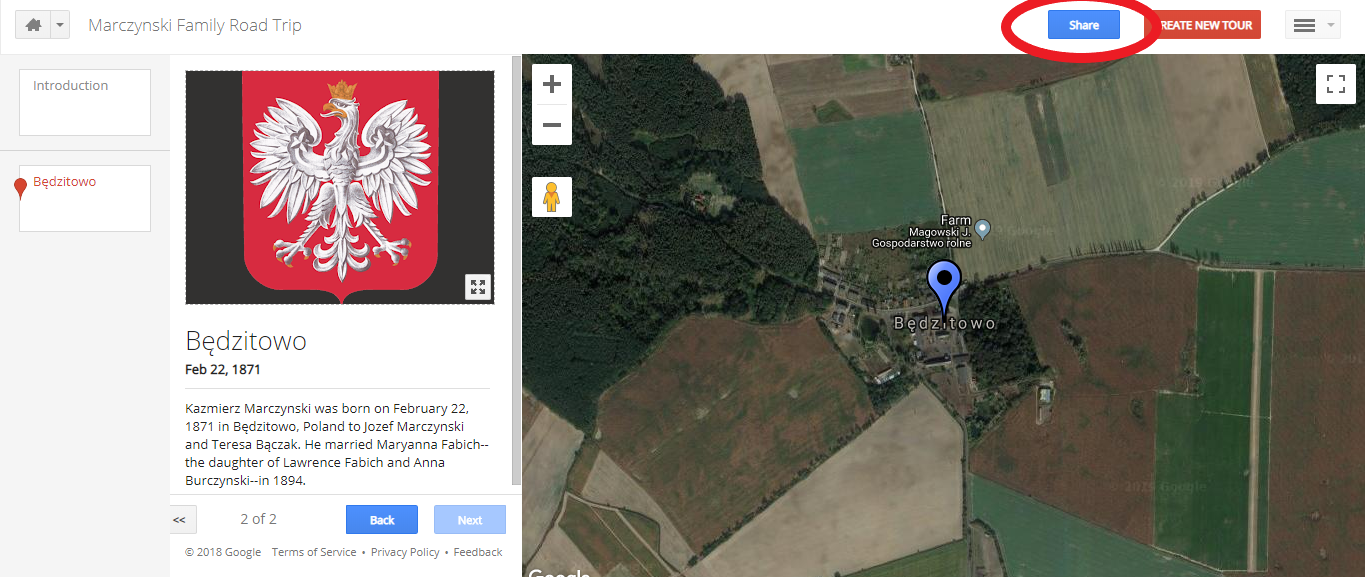
To add my ancestor’s first stop–the place where he was born–I clicked “Add Location” on the left. You’ll need to type a location into the search box, choose the location from the list of options that populates and click “Add to Tour.”

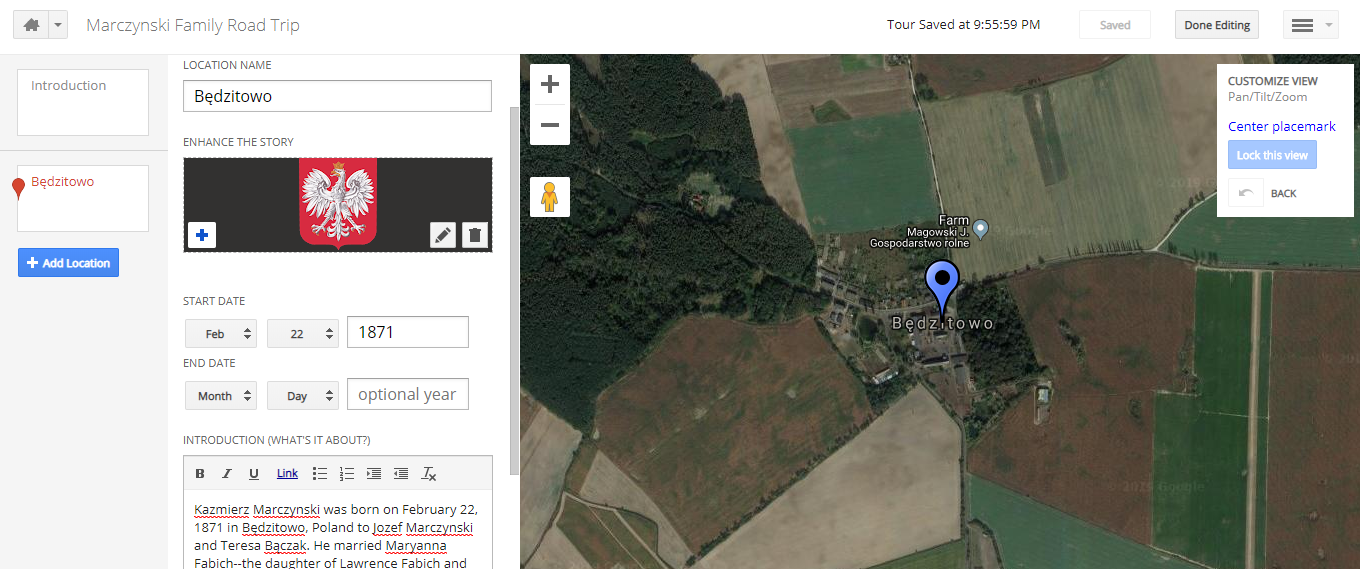
Just like the “Introduction,” you can add up to 25 photos and videos that are associated with this location in your ancestor’s story. There’s a box to write your ancestor’s story, and you can add a start and end date (if applicable). I also changed my placemarks to blue to fit my blog’s theme.
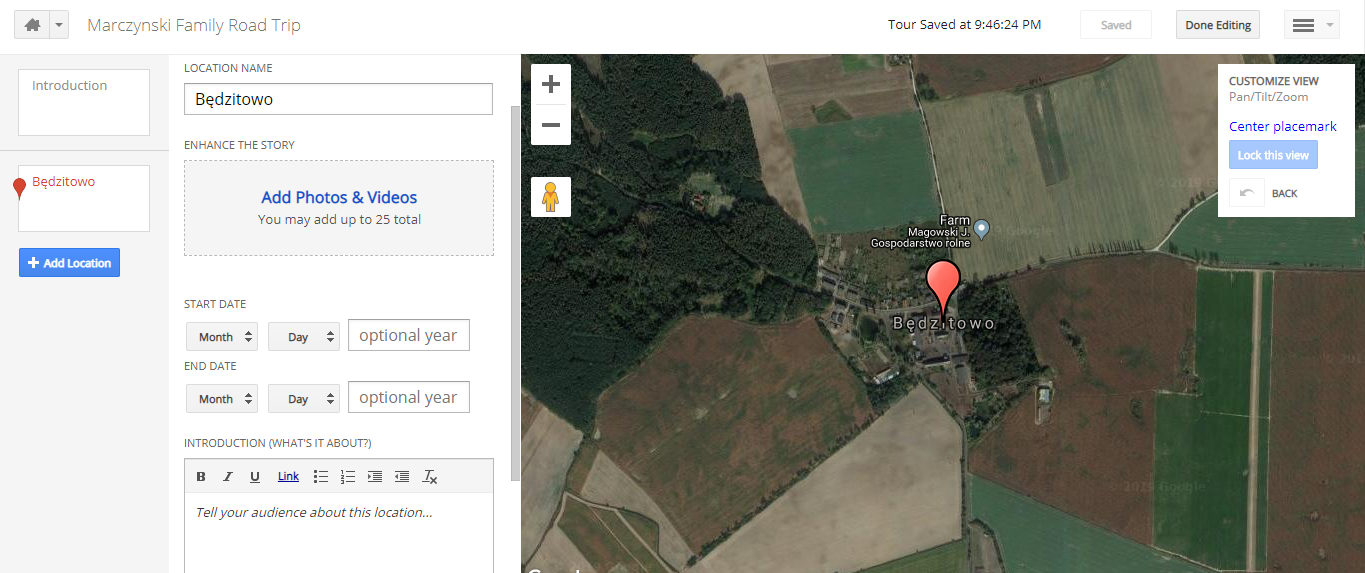
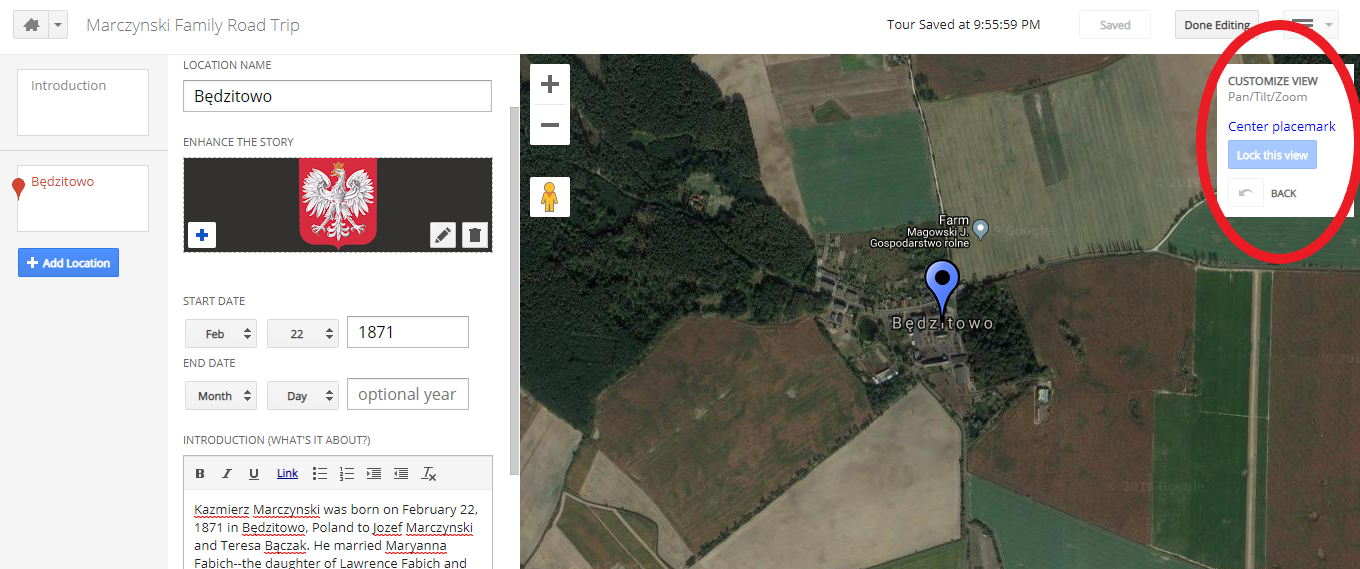
You can also customize your view: zoom in or out, switch to “Street View” or tilt the map and choose “Lock this View” to make sure your viewers see the correct landmark.
4. Save & Share
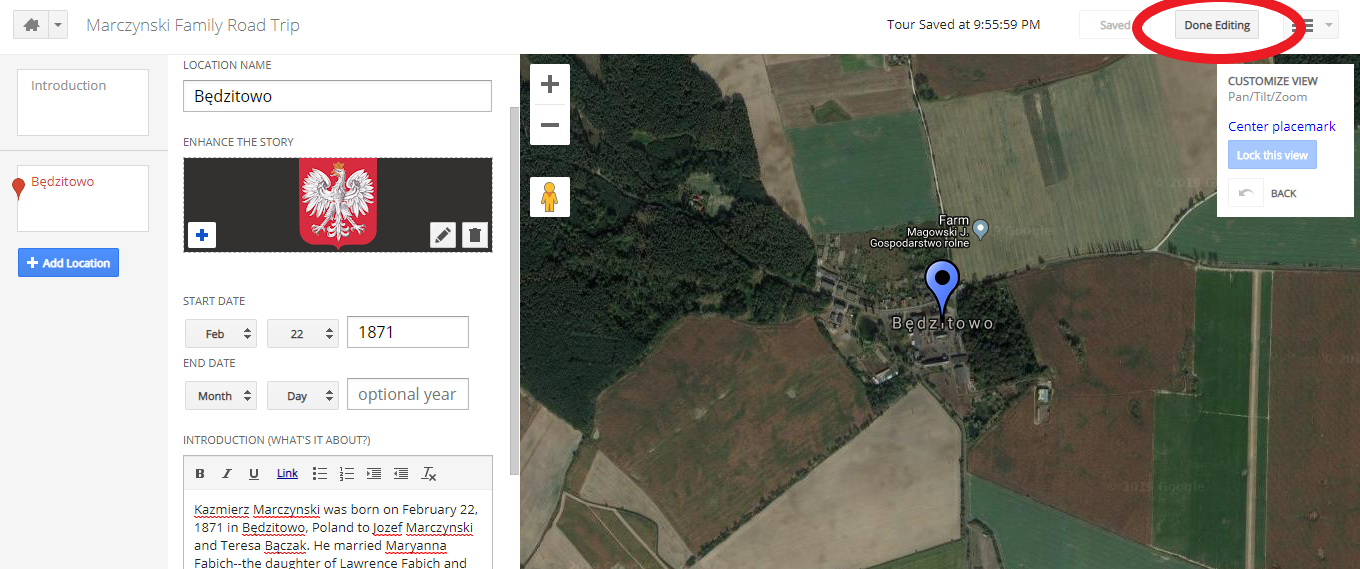
After you’ve added all of your locations, photos and stories, click “Done Editing” on the top right:
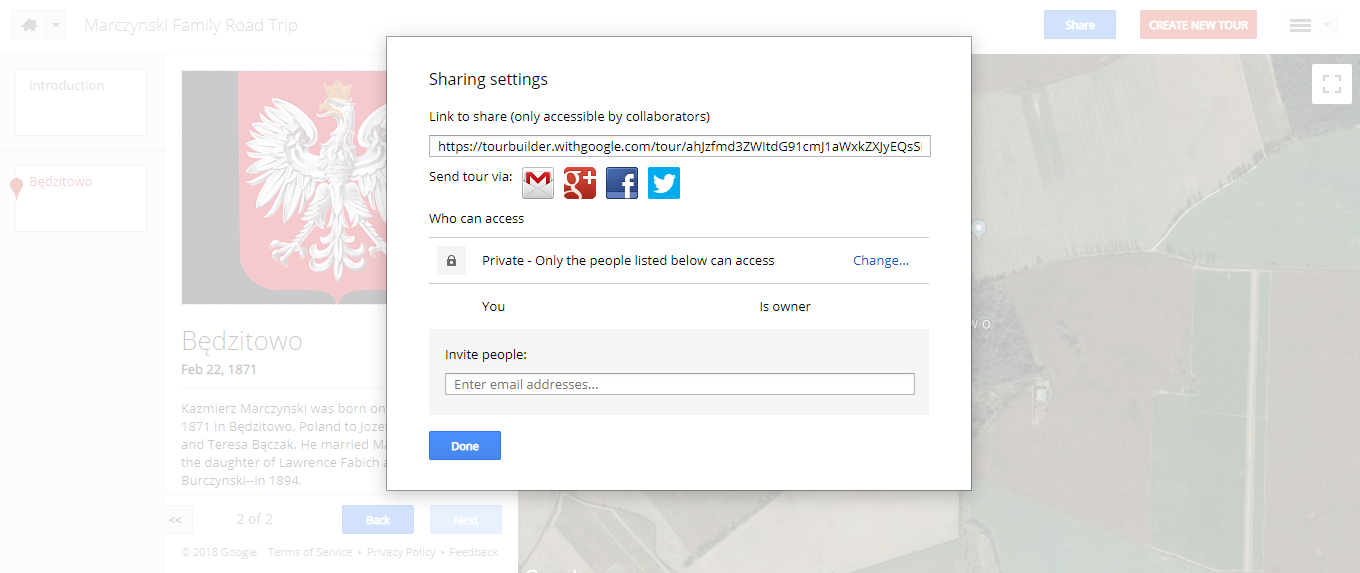
To share your tour, click “Share” on the top right. You can make your tour private or public on the web, or you can share your tour with family and friends only–just type in each of their email addresses.
The Marczynski Family Road Trip
Creating a virtual tour–and following my ancestor’s footsteps–has brought the paper trail to life, and it’s been an effective way to share my research with family members–the visual is easier to connect with than the pages and pages of names and dates. For this 52 Ancestors “Road Trip,” here’s my ancestors’ journey from Poland to New York: it follows my great-great-grandfather’s voyage on the SS Patricia to Eckhart Mines and ends with the home that my great-grandparents built. And if you need more tips and tricks for using Google Tour Builder, visit their tutorial–best of luck!

I am going to try this for a couple of things I am doing. I did not even know about Tour Builder. Thank you!
LikeLiked by 2 people
It’s pretty new (it’s still in beta!) and I found it after HOURS of researching field trip ideas. I’m really glad I stumbled on it–it’s perfect! Good luck!
LikeLiked by 1 person
This is so cool!! I’ve bookmarked it for giving it a try myself when life slows down.
LikeLiked by 2 people
Oh yeah, definitely don’t do what I did–I should’ve been working on my cover letters this past weekend. Instead? I spent way too long making these tours. (I got my first interview today, though, so I guess everything works out in the end!)
LikeLiked by 2 people
Good luck with your interview, Jamie! Teaching position?
LikeLiked by 2 people
Yes! But it already happened–they called and asked if I could come in within the next few hours. It was stressful, but I got there!
LikeLiked by 2 people
Love this!°
LikeLiked by 2 people
Me too–thank you!
LikeLiked by 2 people
Genius!
LikeLiked by 3 people
Thanks! I just get lost in researching for work (and researching genealogy outside of work!).
LikeLiked by 1 person
Nice presentation, Jamie. I’ve been mapping out my ancestor for years in Google Earth, so this sounds like the next interactive step!
LikeLiked by 2 people
Same here–I always take screenshots of my ancestors’ old homes/businesses, but I love being able to map it and add descriptions. Where has this been for the past eight years?
LikeLiked by 1 person
This is such a cool idea! I tried to open your tour, but maybe my phone just doesn’t have the necessary band width. I’ll try tomorrow on my computer.
LikeLiked by 1 person
Did Tour Builder work on your computer? It’s still in beta, so I don’t know how full-proof the loading is. That’s really disappointing!
LikeLiked by 2 people
I’m having too much trouble with my computer and getting connected to the internet.
LikeLike
Sounds like you’re in one of my classes! Our WiFi will time our in the middle of a lesson—it’s a nightmare! 😬 I’m sorry
LikeLiked by 1 person
It seems to work on my computer, but when it goes through the slides, nothing happens with the map. I can click on marks on the map and then it brings up the corresponding slide, but it skips all the slides that don’t have marks on the map. It that how it’s supposed to work?
LikeLiked by 1 person
All of my slides correspond to a point on the map, so something’s definitely off. But the story’s what’s important in the end! 🙂 That does sound like a problem loading Google Earth to me too.
LikeLiked by 1 person
LOVED watching your Marczynski family’s tour! I’m getting a few ideas of my own. Thanks for this terrific post and information!
LikeLiked by 1 person
Thank you–it means a lot!
LikeLike
Oh man, wish I hadn’t seen this! I just mapped out some of my ancestors’ various residences as they moved out west using Google’s custom maps (or whatever it’s called) but that’s nothing compared to this! Thanks for sharing!
LikeLiked by 1 person
Haha, sorry! I used to use Google Maps too, but I love that Tour Builder incorporates Google Earth and lets me customize the view/tell a story. It’s exactly what Google Maps was missing for me (and I didn’t even know I was missing anything until I found this new tool). But I know what you mean–this completely took over my weekend!
LikeLiked by 2 people
I used Google maps for research before but never heard of this one.
LikeLiked by 1 person
Me either–I just find random technology resources all the time.
LikeLiked by 1 person
I’m so excited! This is just what I’ve been wanting. Thank you so much for a fabulous find!
LikeLiked by 1 person
Glad to hear it! I love it, too–it’s exactly the piece that was missing from Google Maps for me.
LikeLike
I just looked at your Google Tour and it is wonderful!!! I am going to try it. Thanks for sharing.
LikeLiked by 1 person
Anytime–I’m glad you liked it!
LikeLike
What fun! Thank you for telling us about this.
LikeLiked by 1 person
Don’t mention it! I love this site, but now it’s taking up way too much of my time, ha!
LikeLike
I think this would be even easier than Google Earth for setting up this sort of presentation. Good job! Thanks for sharing!
LikeLiked by 2 people
Thank you–I think it’s easier to use, for sure!
LikeLike
Very cool!!! I need to try this – thanks so much for sharing the detailed instructions!!!
LikeLiked by 1 person
Thank you! I love it, and it’s *slightly* interesting to my family–anything that convinces my family to invest in the story is worth it for me! (They think it’s interesting, but they’re not as obsessed with family history as I am.)
LikeLiked by 1 person
Jamie, thank you! This is brilliant! What a great addition to ancestor blogs, a visual for my family, well for everyone!
LikeLiked by 1 person
Thank you for stopping by! This means a lot–it was a fantastic resource for my students, and it seemed to fit my genealogy interests perfectly, as well. Two worlds merged for me! I’m glad it’ll help you out, too.
LikeLiked by 1 person
I will definitely have to check this out. I agree – it looks perfect for telling family stories. Thanks for sharing this, as I hadn’t heard of Google Tool Builder before.
LikeLiked by 1 person
I’m glad! I really like this site—I can’t wait to see where the updates take it over the years.
LikeLike
Great idea. But it’s not Google Tour anymore. They discontinued that. Now it’s Google Project.
LikeLiked by 1 person
I saw that they were discontinuing the site, too, a few weeks ago! Glad to hear there’s something new. I’ll have to check it out this weekend!
LikeLike